
Qiata MultiSpace
Before you start
With Release 2.0, Qiata now offers the first entry into "MultiSpace". So far, there are basically two usable areas (so-called "spaces") available to the user, namely the transfer area for the exchange of files or directories with third parties, and the team transfer area for the regulated collaboration of internal and external members of a team. Now, with the new Personal Space, the first MultiSpace variant is released and opens up completely new possibilities.
While all file transfers and team transfers at Qiata are permanently and comprehensibly recorded in an audit log, the new personal space function is different. Personal Space is the first of many other MultiSpace modules currently being implemented. An area reserved for personal use is now available for all authorized users.
From the user's perspective, personal space can be used in different ways. Since Personal Space also uses basic functions of the so-called WebDAV protocol, the user can integrate it directly into his operating system as a (virtual) drive. The files are actually on a drive of the Qiata, even if the user sees his files directly as a drive in his operating system.
Administration
At Qiata there are two different quotas with the MultiSpace module. On the one hand the quota for the "transfer area" and on the other hand the quota for the "PersonalSpace". Both quota values can be set independently of one another, but cannot exceed the maximum quota limit of the company.
Example:
The Qiata system has a maximum quota limit of 100GB. A possible breakdown of the different quotas would now be 50/50, i.e. the transfer area gets 50GB and the PersonalSpace also 50GB. Of course, these values are variable - it would also be possible to split the transfer area: 70GB and PersonalSpace: 30GB.
It is important that the sum total of Transfer Quota and PersonalSpace Quota cannot exceed the maximum quota limit of the system.
Map PersonalSpace
Add Qiata Personal Space (MultiSpace) to Windows
You can add Qiata Personal Space as a WebDAV drive using the native Windows integration. By mapping to a drive, you can browse files stored on Qiata Personal Space like files stored on a mapped network drive. Please note that an active network connection is required to use this function.
Map your Personal Space using the Explorer
This step connects your PC to your Qiata Personal Space. Your Personal Space folder will show up as a mapped drive on your Windows Explorer.
1. Press the Windows button + E simultaneously to bring up your Windows Explorer.
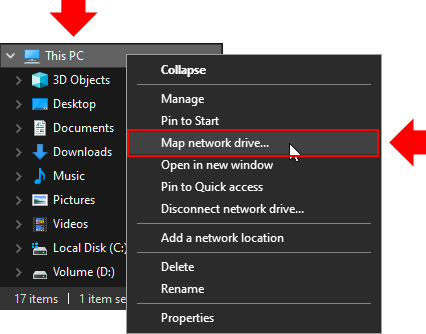
2. Right-click on This PC and select Map network drive… from the drop-down menu.
3. Choose a drive letter to which you want to map your Personal Space.
4. Use the Personal Space path and add it to Folder. You will find the Personal Space path in an email sent to you or in your Qiata WebUI, under the "MultiSpace" item.
Important: Do not use an IP-address instead of a FQDN as Windows does not support this.
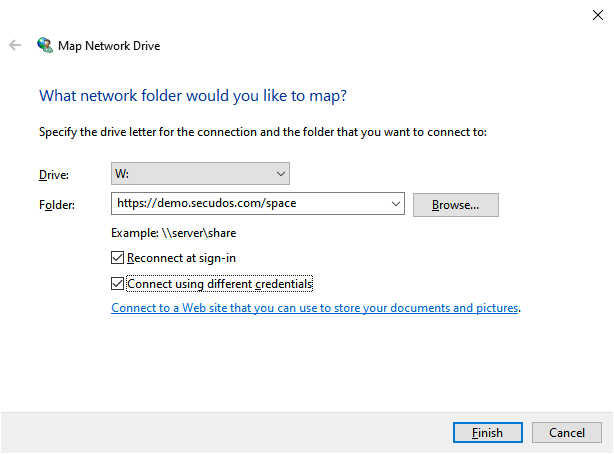
5. Make sure to check Reconnect at sign-in, to ensure that the mapping stays persistent upon subsequent reboots.
Map your Personal Space using CMD
This step connects your PC to your Qiata Personal Space using the command prompt. Your Personal Space folder will show up as a mapped drive on your Windows Explorer.
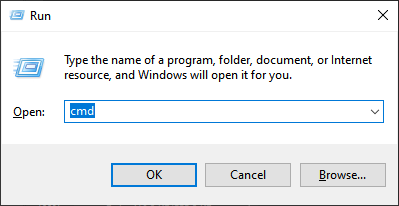
1. Open a command prompt in your Windows (e.g WIN+R -> cmd -> Enter).
2. Use the following command to automatically setup your Personal Space as a mapped drive. If necessary, please adjust the drive letter and change the address and access data to your own. You can find those informations within your account details mail, send from your Qiata. If you have forgotten your password, you can change or reset it at any time using the WebUI.
net use Z: https://

Add Qiata Personal Space (MultiSpace) to Ubuntu
You can add Qiata Personal Space as a WebDAV drive using the Ubuntu integration. By mapping to a drive, you can browse files stored on Qiata Personal Space like files stored on a mapped network drive. Please note that an active network connection is required to use this function.
Add Personal Space via Nautilus
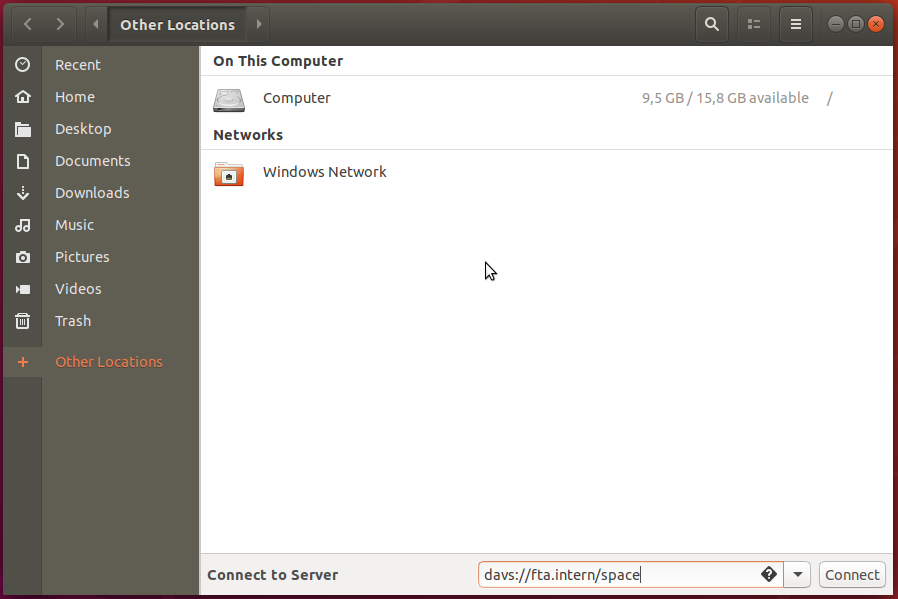
1. Open Nautilus and navigate to the Other Locations tab.
2. Enter your protocol and your Personal Space path.
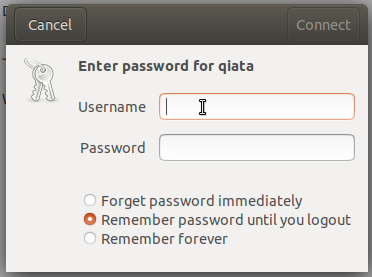
3. Click on Connect. A popup will appear, in wich you must enter your access data. Please enter your mail-address as username and your application-specific password. You can find your account details in your mailbox. If you have forgotten your password, you can change or reset it at any time using the WebUI.
Map your Personal Space using the shell and WebDav protocol
This step connects your PC to your Qiata Personal Space using the shell. Your Personal Space folder will show up as a mounted folder in your filesystem.
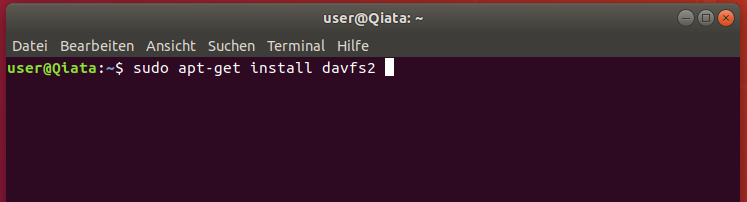
1. For mounting the Qiata Personal Space root rights and the programm davfs2 are required.
2. The program can be installed from the Ubuntu repository
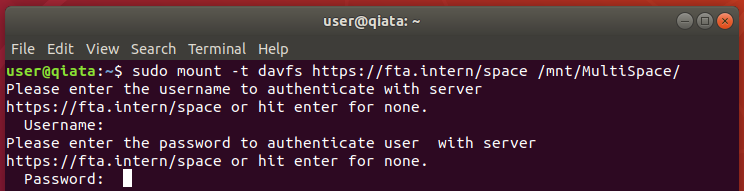
3. Use the following command to mount your Personal Space. If necessary, please adjust the mounting location to your own.
sudo mount -t davfs https://fta.intern/space/mnt/MultiSpace
4. Enter your mail-address as username and your application-specific password. You can find your account details in your mailbox. If you have forgotten your password, you can change or reset it at any time using the WebUI.
Add Qiata Personal Space (MultiSpace) to macOS
You can add Qiata Personal Space as a WebDAV drive using the native macOS integration. By mapping to a netdrive, you can browse files stored on Qiata PersonalSpace like files stored on a mapped network drive. Please note that an active network connection is required to use this feature.
Map your PersonalSpace using the Finder
This step connects your masOS to your Qiata PersonalSpace. Your Personal Space folder will show up as a mapped drive on your Finder.
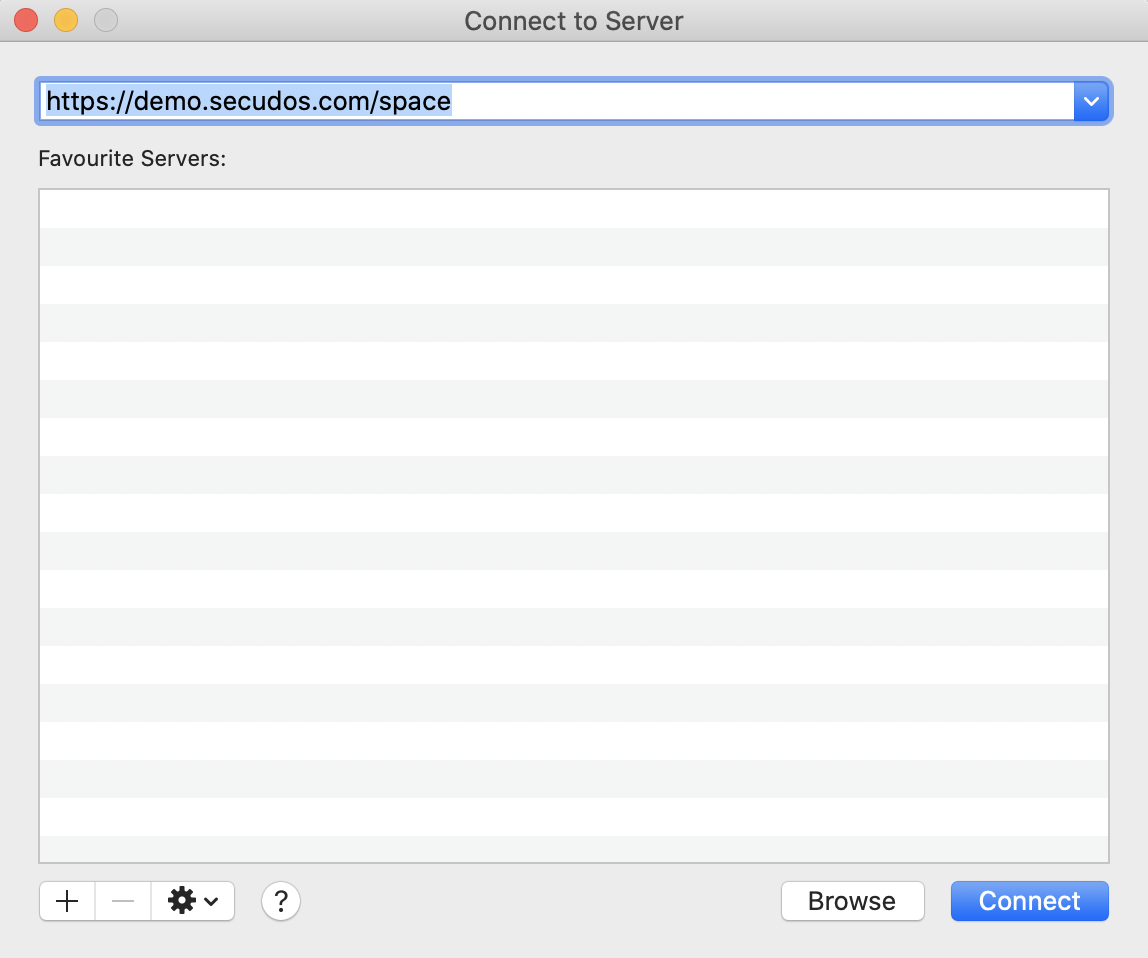
1. Start the Finder.
2. Press the command + k simultaneously to open connect to a server.
3. Type in the Personal Space path and press enter. You will find the PersonalSpace path in an email sent to you or in your Qiata WebUI, under the "MultiSpace" item.
For example: https://files.example.com/space
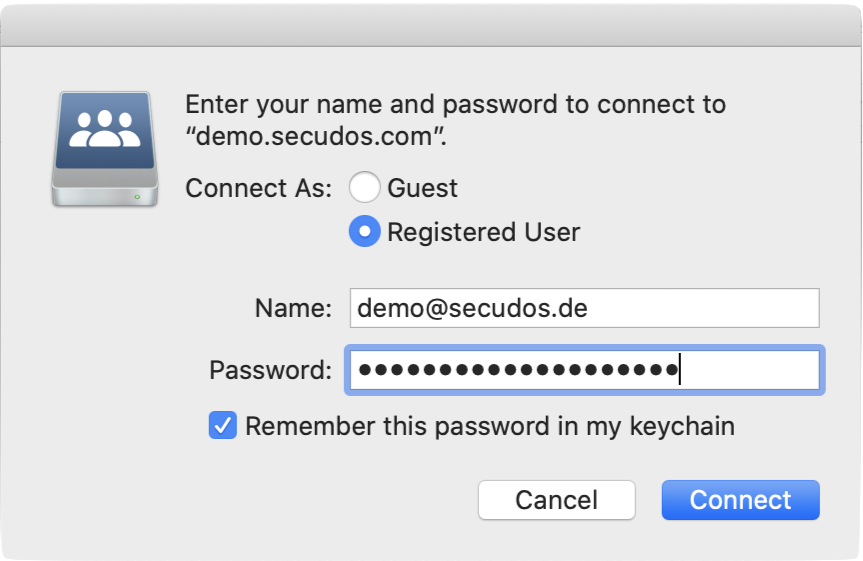
4. Type in your PersonalSpace account details and press enter. You can find your account details in your mailbox. If you have forgotten your password, you can change or reset it at any time using the WebUI.
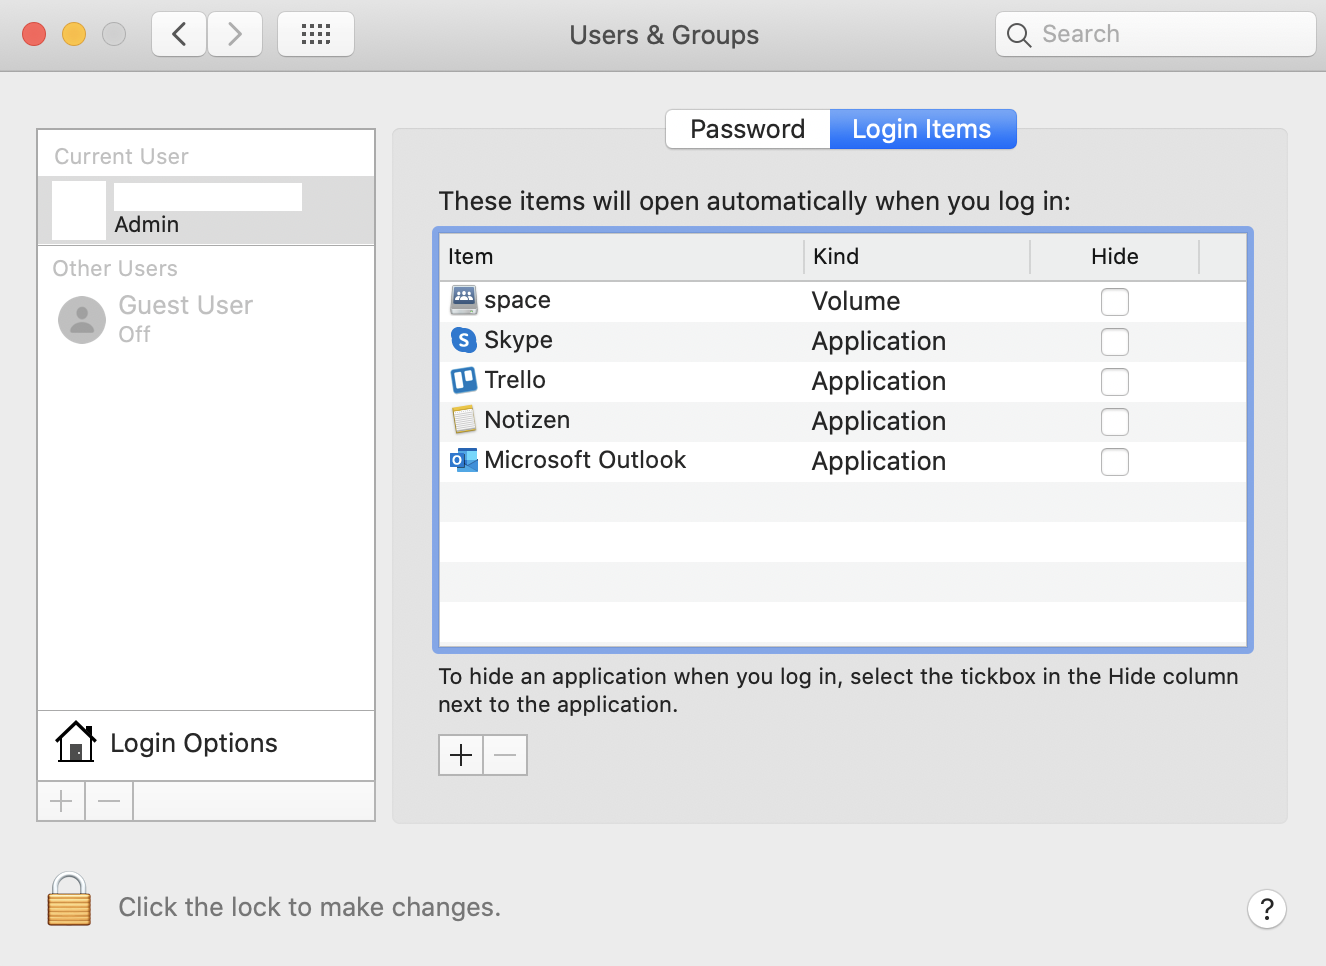
Once you are connected to the network drive you can set up automatic connections upon logging into the Mac:
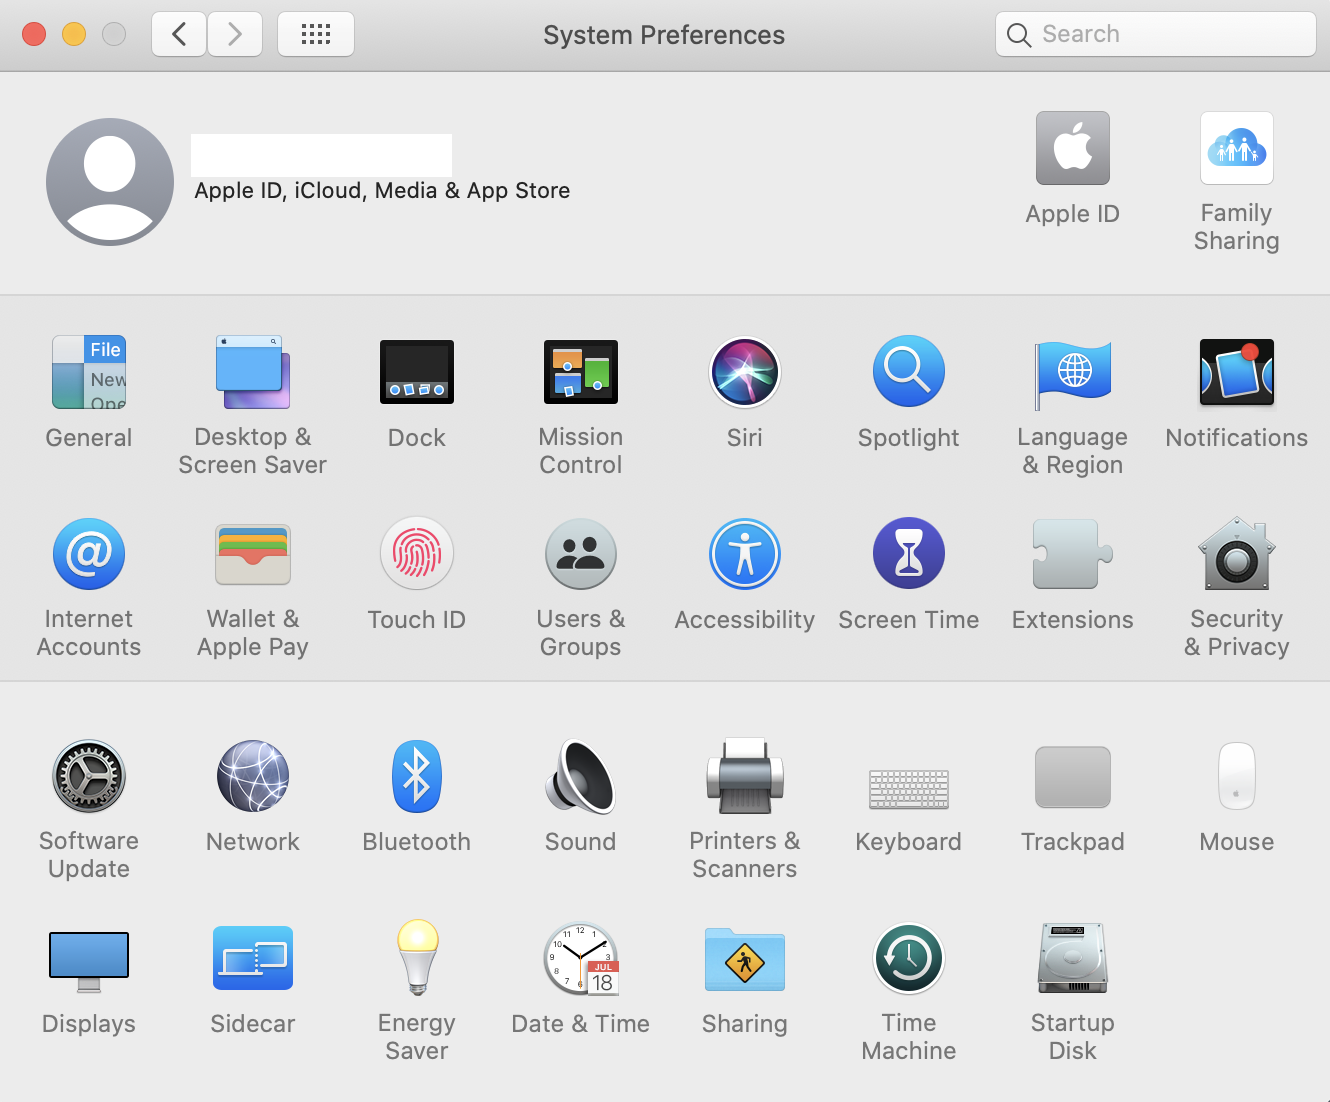
1. Open System Preferences and click on Users & Groups.
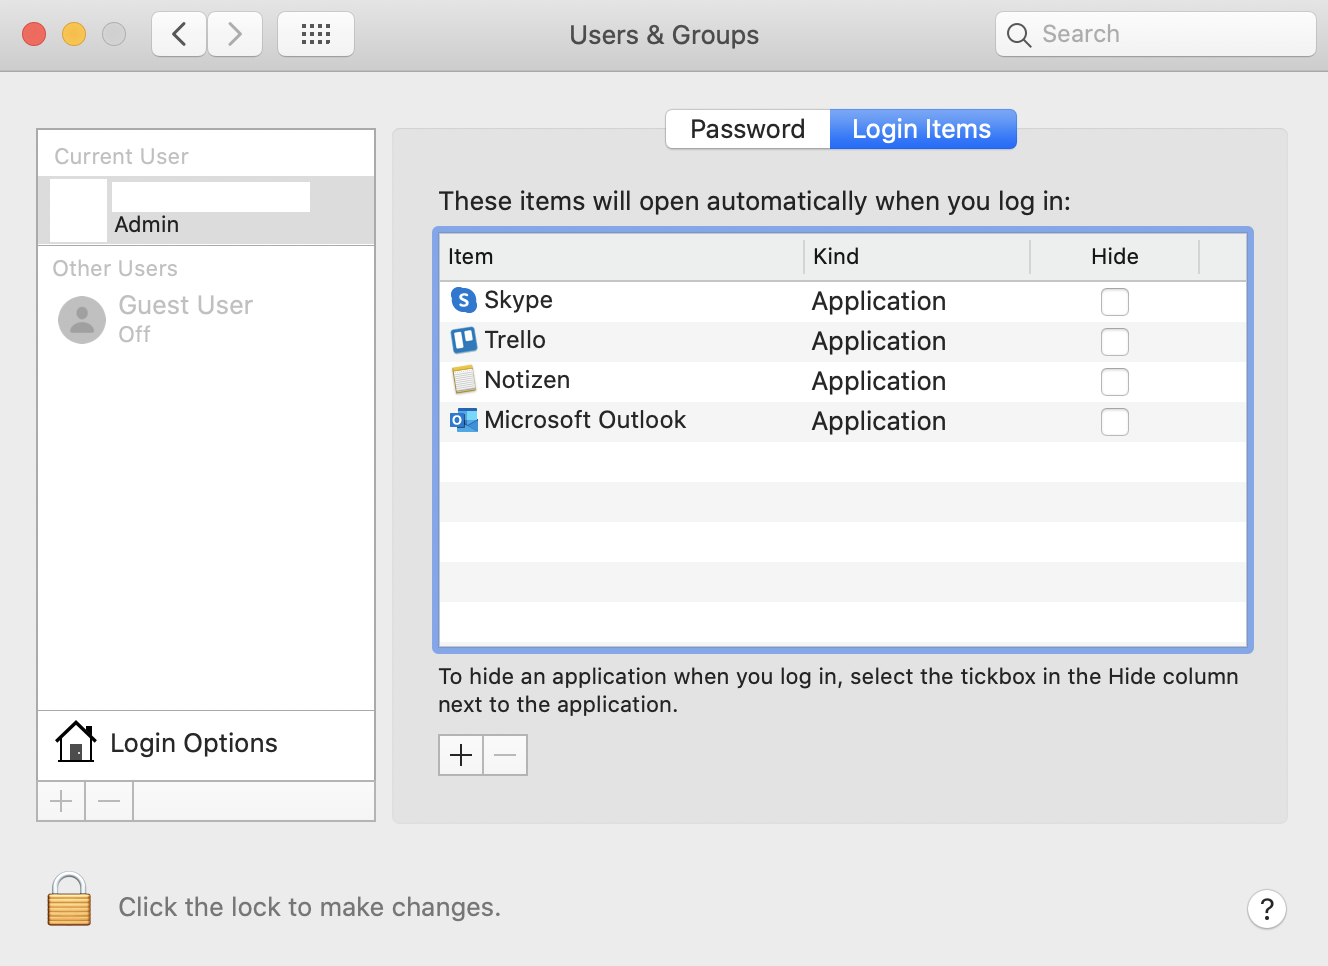
2. Select your user name from the list left and then click the Login Items tab at the top.
3. Click on + and choose the mounted network drive.
General Questions
WebDAV stands for Web-based Distributed Authoring and Versioning. WebDAV is a standard for delivering files over the Internet.
The PersonalSpace from MultiSpace can be used flexibly and can be integrated into Windows, Mac and Linux systems. Use hundreds of apps for smartphones and tablets. These apps offer a wide range of functions so that you can access, edit or share your files from anywhere, because PersonalSpace works with the open WebDAV standard.